Showing posts with label how-to. Show all posts

Friday, February 28, 2014

How I Made a Fascinator

What is a hair fascinator? It is a hair doodad that you wear instead of a hat. They are often trimmed with tulle and feathers. Remember you can enlarge the photos by clicking on them.
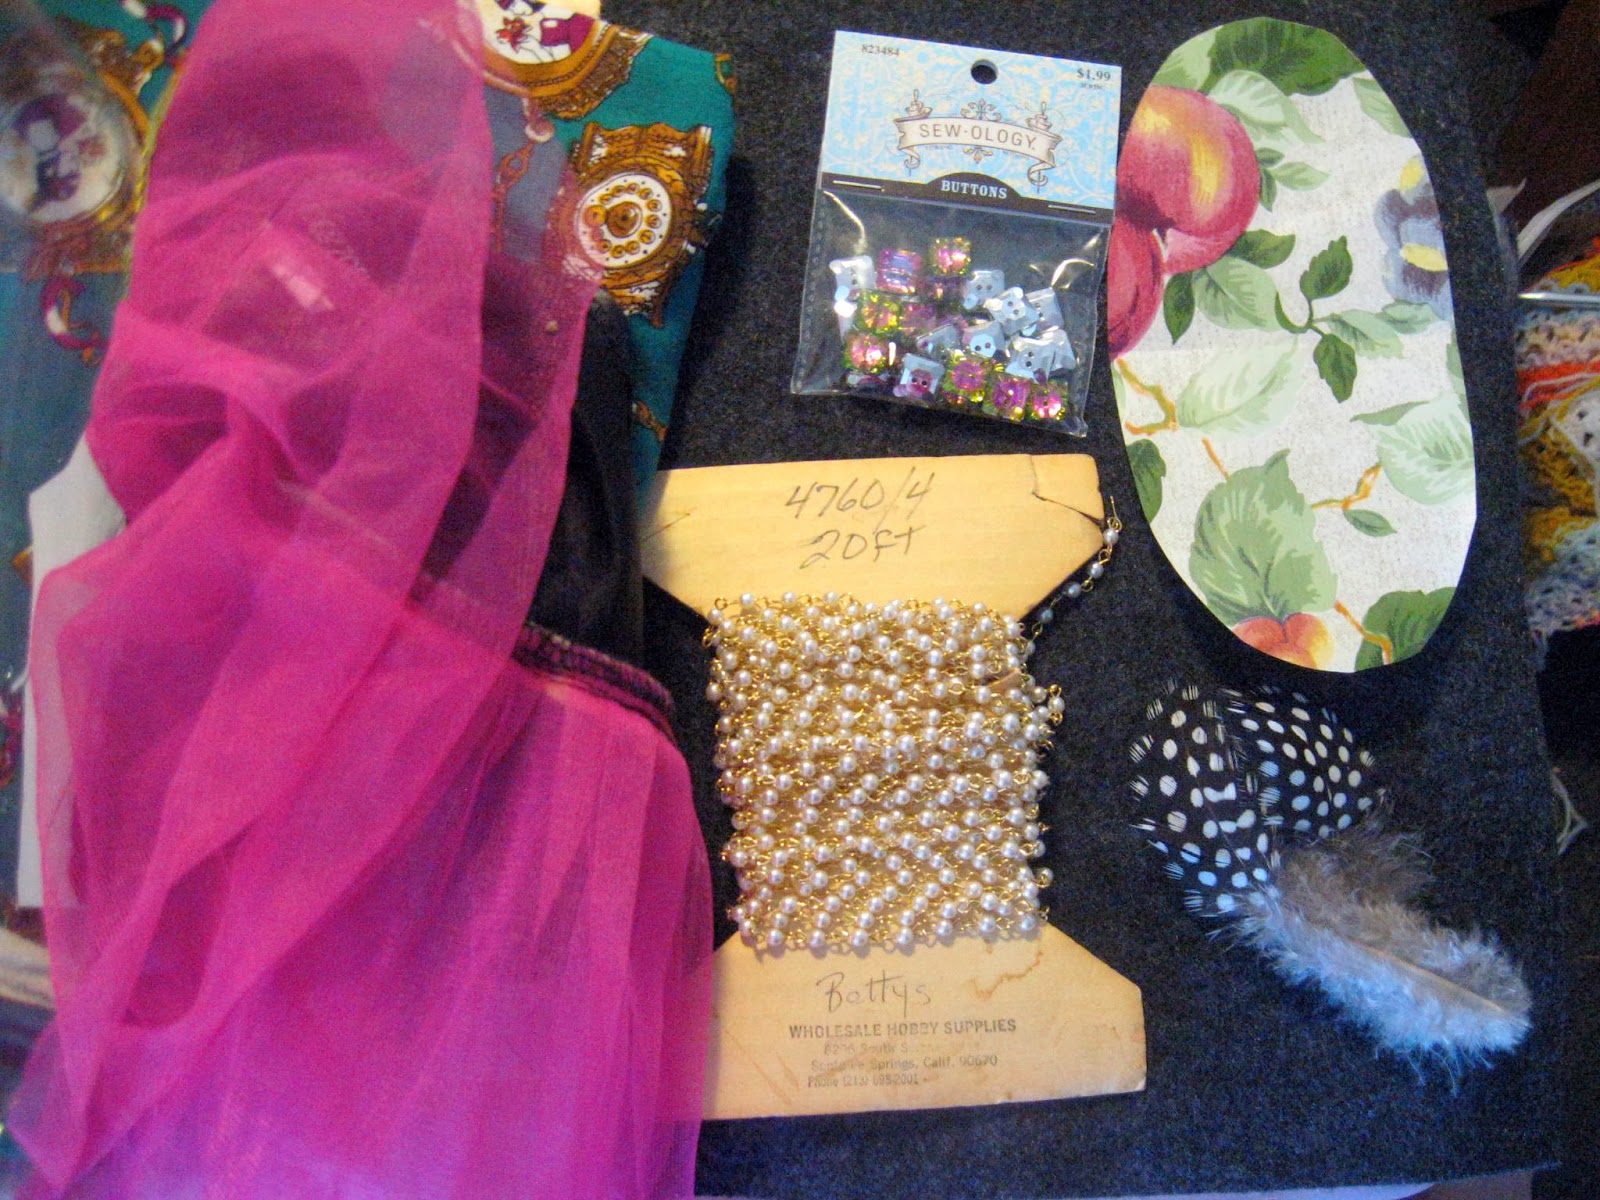
  1. First I gathered all the parts together that I thought I might need. I rinsed out and dried a 2 Liter soda bottle to make the support for the fascinator.
    From left to right: Soda bottle, fabric, pink tulle, square buttons, gray felt, contact paper pattern, feathers, and pearl trim.
    2. I cut an oval out of the contact paper. I picked this so it would be flexible. I held it against the bottle and traced around it with a Sharpie marker. Then I cut out my oval. This goes inside the fascinator and since it has a curve it fits the shape of your head. I saved the pattern to cut out the fabric and the lining. When I cut the fabric, I allowed 1/4" seam allowance. On the future ones I'll add 1/2". 
    Save the pattern for the plastic, the fabric, and the felt lining.

    Hold the pattern to the bottle and trace around it.
    Carefully cut out the oval and clean up the edges a bit.

    3. Now think of it as a sandwich. You are going to have 3 layers: Fabric, plastic center, & felt lining. Got it? I placed the fabric on top of the plastic and used a sharp needle to tack it through the plastic at both ends with a needle and thread to line it up. I recommend using a thimble. Then I ran a running stitch along the edge to get it to fold around the plastic.  Then I sewed the gold pearl and chain trim around the perimeter.

    I only sewed through the plastic when I had to. When I sewed the pearl trim on, it is 'couched' onto the green fabric; not through the plastic.

    4. The pink tulle came from a costume I bought to rip apart last Oct. I tacked that to one end, followed by the feathers and then a gold 'knot' button to cover up the ends. 
    You can still see the plastic inside the fascinator. This will be covered by the gray felt lining.

I am amused that the fabric I picked has an illustration of a woman wearing a fascinator.

Love these square buttons. I used 3 on the fascinator. They'll look great on the dance floor.


Polka dotted guinea hen feathers.
I sewed the buttons through the plastic.
5. After you sew on everything you are going to add, it's time to sew on the felt lining. Line it up carefully, tuck the cover fabric under it and sew the edges together with a whip stitch as neatly as possible. Most people would then attach it to an Alice band, but those are too small and pinchy. So I usually sew mine to 1/8" black elastic or stretch cording. If you have light colored hair you can use white or beige elastic.
Attaching the lining.

6. You can do some of the steps with hot melt glue. I live in the desert and I don't feel secure using glue. But if you needed to make a bunch in a hurry for a dance recital and they'd only be worn a few times, hot melt should be a lot faster. You can also use it to keep things from shifting before you sew them. I like hand sewing, so I sewed it all together.

Hair Fascinator by Fayme Harper from Pigglewiggins


For the photos I just used bobby pins. Now I just need someone to invite me to a cocktail party or the Kentucky Derby.

Saturday, February 22, 2014

Sand Candle From Repurposed Wax Part Two

I was so excited to dig up the candle this morning.


  1. Untie the wick from the stick. Use the stick to loosen the wet sand from around the candle. It's like digging up treasure.
  2. Brush excess sand off of candle.
  3. Now I could have either let it dry and then brushed more sand off, or rinsed it off with a hose. I used the hose and it only took a few minutes.
    I can't wait to see what it looks like!


    Loosen the sand around the candle.

    Brush off the excess sand.
    4. Trim the wick
    After rinsing with a hose.
  4.  

    5. Eventually I'll make the candle level by sitting the candle in a old warm skillet and carefully adjusting the legs.
    6. If you want to remove more of the sand, you can dip the candle in a pot of simmering water. But I like my sand candles sandy. It reminds me of the beach.

Shell detail. See the layers of pink and brown?
This is a demo photo for the blog. I'd never burn a candle this close to books.
     
Finished Sand Candle
When I level it, it will look like this.
    If you make one I'd love to see it. Put a link in the comments.  
    TIP: I collect old pots and pans for candle making and keep them in a box for that purpose. Probably best not to use your candle making pots and  pans for making food. Thrift stores and yard sales are a great place to look for old pots and pans. 

Monday, September 02, 2013

Drawing For Halloween

Today was Halloween doodle day. I just finished a really challenging post telling about all the new doodles. My doodle blog was lonely so I put them over there if you want to take a peek. Oodles of Doodles Halloween 'Hoodles'.


Mummies and Zombies oh my.


Sunday, February 10, 2013

Crafts on Pinterest

Hello My Cupcakes,

There are so many great craft tutorials on Pinterest that you are really missing out if you don't have an account there.  Here are some that I liked and added to my craft board. http://pinterest.com/mystictheodora/craft-ideas/ It seems not having any ideas will never be an issue again, but rather how will you have time to do any crafts when you can't get off of Pinterest. Haha.


Wednesday, January 07, 2009

Men Are From Mars When it Comes to Crafting Too

Today I was under the weather and didn't get much done. Plus my bf came home early from his vacation and having him here unexpectedly kind of blew my schedule to bits. We have so little workspace we keep tripping over each other to get things done. It's not just getting in each others physical way, but we don't agree on how things should be built. He's constantly asking me, "Why are you doing it that way, here's a better way." Then his way doesn't work at all because he doesn't really comprehend what I'm trying to do in the first place. You could ask us each to make the same square pillow and our working methods are so different that even if we came up with the same end results we wouldn't have a thing in common with the way we got from A to B. At one point today we both got so frustrated he went and sat alone in his room for an hour while I sat on the couch.

But at least I got the rustic loom put together. Tomorrow I will prime it and paint it, then after it dries I can weave on it.

Wednesday, September 24, 2008

Free Head Wrap Pattern for beginners


Today I am knitting a head wrap out of Homespun that is 2x2 ribbing and 14 stitches wide. You can make one too.


Supplies:
Pair of knitting needles in a size you are comfortable with
Yarn that feels soft against your face
Yarn or tapestry needle.

Stitches you need to know: Knit and Purl
You must also know how to cast on and cast off.

Cast on 14 stitches.
Knit 2, Purl 2 until you reach the end of the first row.
Turn
Purl 2, Knit 2 until you reach the end of the 2nd row.

Repeat rows 1 and 2 until the piece is long enough to form a tube around your head.
Cast off.
Use yarn needle to sew narrow edges to each other using an overcast stitch or your favorite joining stitch.

Optional: Sew on an artificial flower or decoration.

Put head wrap on, take photo, and send me your picture and I'll add it to my blog.

Pattern copyright 2008 by Fayme Harper
For non-commercial use only.

Need help learning to knit? My favorite site is http://www.knittinghelp.com.


Update: http://craftaday.blogspot.com/2008/11/vintage-book-and-knitted-headband.html