Friday, February 28, 2014

How I Made a Fascinator

What is a hair fascinator? It is a hair doodad that you wear instead of a hat. They are often trimmed with tulle and feathers. Remember you can enlarge the photos by clicking on them.
  1. First I gathered all the parts together that I thought I might need. I rinsed out and dried a 2 Liter soda bottle to make the support for the fascinator.
    From left to right: Soda bottle, fabric, pink tulle, square buttons, gray felt, contact paper pattern, feathers, and pearl trim.
    2. I cut an oval out of the contact paper. I picked this so it would be flexible. I held it against the bottle and traced around it with a Sharpie marker. Then I cut out my oval. This goes inside the fascinator and since it has a curve it fits the shape of your head. I saved the pattern to cut out the fabric and the lining. When I cut the fabric, I allowed 1/4" seam allowance. On the future ones I'll add 1/2". 
    Save the pattern for the plastic, the fabric, and the felt lining.

    Hold the pattern to the bottle and trace around it.
    Carefully cut out the oval and clean up the edges a bit.

    3. Now think of it as a sandwich. You are going to have 3 layers: Fabric, plastic center, & felt lining. Got it? I placed the fabric on top of the plastic and used a sharp needle to tack it through the plastic at both ends with a needle and thread to line it up. I recommend using a thimble. Then I ran a running stitch along the edge to get it to fold around the plastic.  Then I sewed the gold pearl and chain trim around the perimeter.

    I only sewed through the plastic when I had to. When I sewed the pearl trim on, it is 'couched' onto the green fabric; not through the plastic.

    4. The pink tulle came from a costume I bought to rip apart last Oct. I tacked that to one end, followed by the feathers and then a gold 'knot' button to cover up the ends. 
    You can still see the plastic inside the fascinator. This will be covered by the gray felt lining.

I am amused that the fabric I picked has an illustration of a woman wearing a fascinator.

Love these square buttons. I used 3 on the fascinator. They'll look great on the dance floor.


Polka dotted guinea hen feathers.
I sewed the buttons through the plastic.
5. After you sew on everything you are going to add, it's time to sew on the felt lining. Line it up carefully, tuck the cover fabric under it and sew the edges together with a whip stitch as neatly as possible. Most people would then attach it to an Alice band, but those are too small and pinchy. So I usually sew mine to 1/8" black elastic or stretch cording. If you have light colored hair you can use white or beige elastic.
Attaching the lining.

6. You can do some of the steps with hot melt glue. I live in the desert and I don't feel secure using glue. But if you needed to make a bunch in a hurry for a dance recital and they'd only be worn a few times, hot melt should be a lot faster. You can also use it to keep things from shifting before you sew them. I like hand sewing, so I sewed it all together.

Hair Fascinator by Fayme Harper from Pigglewiggins


For the photos I just used bobby pins. Now I just need someone to invite me to a cocktail party or the Kentucky Derby.

Thursday, February 27, 2014

Hair Fascintor With Feathers and Pink Tulle Made Out of a Soda Bottle

I'm busy making a hair fascinator, photos to follow. I'm just about to sew on the polka dotted feathers.

Here it is: Fascinator

Saturday, February 22, 2014

Sand Candle From Repurposed Wax Part Two

I was so excited to dig up the candle this morning.


  1. Untie the wick from the stick. Use the stick to loosen the wet sand from around the candle. It's like digging up treasure.
  2. Brush excess sand off of candle.
  3. Now I could have either let it dry and then brushed more sand off, or rinsed it off with a hose. I used the hose and it only took a few minutes.
    I can't wait to see what it looks like!


    Loosen the sand around the candle.

    Brush off the excess sand.
    4. Trim the wick
    After rinsing with a hose.
  4.  

    5. Eventually I'll make the candle level by sitting the candle in a old warm skillet and carefully adjusting the legs.
    6. If you want to remove more of the sand, you can dip the candle in a pot of simmering water. But I like my sand candles sandy. It reminds me of the beach.

Shell detail. See the layers of pink and brown?
This is a demo photo for the blog. I'd never burn a candle this close to books.
     
Finished Sand Candle
When I level it, it will look like this.
    If you make one I'd love to see it. Put a link in the comments.  
    TIP: I collect old pots and pans for candle making and keep them in a box for that purpose. Probably best not to use your candle making pots and  pans for making food. Thrift stores and yard sales are a great place to look for old pots and pans. 

Friday, February 21, 2014

Making a Sand Candle Out of Recycled Wax Part 1


I got tired of talking about making candles and decided to just do it. I learned how to make sand candles in the 70's, and I made them again once in the 80's. So here I am again. When life gives you sand, make sand candles.

Getting the Mold Ready
Fill bucket with sifted sand.
Close up of wick placement and holes in sand made with my fingers.
  1. I filled a bucket with sifted sand. Sift it through whatever screen you have on hand. I used a bicycle basket with fine holes. 
  2. Get the sand damp. We're talking 'sandcastle' and not 'mud pie'
  3. Dig out a scoop with your hand to put the wax in. Then I poked my fingers in to give my candle 'legs'. 
  4. I took a seashell and pressed it into the side, with the part I want to show facing into the sand.
  5. Place a wick. I used a stick to loop it over so it will stay where I want it.
Wick placement.
Melting the Wax
  1. I melted my wax in a 'double boiler' set up using an old thrifted tea pot and a metal can. I should have bent the can to make a pour spout but oh well.
    Melting wax for a sand candle.
    Almost melted. Use an old fork to remove debris like old wicks or paper bits.
  2. Heat the water in the teapot over medium with the can of wax sitting in it. The tea kettle is about 1/3 full of water. Never leave wax unattended. It is flammable. So keep the heat down and keep an eye on it.
  3. I used old candle wax, two warped tapers, a few crayons, and a chunk of beeswax so the can would be almost full. As the wax melted I stirred it with an old fork. Then I fished out the old wicks and debris with the fork.
  4. I turned off the heat and let the steam settle down. Then I put a lid over it and carried it outside with a potholder.
    Carefully carrying hot wax outside.
  5. I very carefully picked up the can with tongs and poured it into the mold. Wax shrinks in the center when it cools so I knew I'd have to pour a 2nd layer.
    So far so good. You can see the seashell poking up a bit. The second pour will cover it.

    The hardest thing about making candles is having to wait to see the end result.
  6. I melted another 1/2 can of wax. Most of it was beeswax and a few crayon pieces. 
  7. I probably should have waited about 2 hours before the 2nd  pour, but I just wanted to get on with it.
    After the 2nd pour. Just the right level of wax.
Stay tuned for part 2 tomorrow to see how it turns out!

Thursday, February 20, 2014

Spring Is Coming I Promise

Signs of spring are in the air. The new mulberry trees are leafing out. My neighbor has blossoms on her cherry and plum trees.  Some are white and some are pink.  They smell wonderful. I saw a roadrunner on my front porch too.

It was a little too chilly to knit outdoors so I worked on my shawl in the house while watching a Rolling Stones documentary and the Doors movie with Val Kilmer as Jim Morrison. I can't help but to compare the two bands and what made one last for decades while the other one crashed and burned.

I have some ideas for a shabby chic purse I want to make. I know it's going to be heavy and I'm not supposed to carry a heavy purse. But I still want to do it. I need to finish up some other projects first, but I can't wait too long because my other purse is disintegrating.

Spring comes early to the desert and doesn't last very long.

Saturday, February 15, 2014

Turquoise and Lampwork Bead Necklaces

My friend came over on Thursday and we worked on necklaces.  That is to say, I made one pink and black necklace with lampwork beads and she made four or five necklaces. I can't seem to bead and talk at the same time.
Since it is warm outside, I decided I can go back to working in my studio, which is a rental container in the backyard. So I cleaned a work space and started working before dark. The necklace I made Thursday was on string, which I was unhappy with, so tonight I restrung it on wire. Then I made another turquoise necklace which I really like. By then it was dark out, and once I turned off the lights in my container, the yard was pitch black. Now I know where to put the two solar spike lights I bought. At least my boyfriend thought ahead for me and turned on the back porch light.

I will take better photos sometime when it is not dark out, but I think blog posts are always better with photos, so I'll post what I have.

Two necklaces.

The turquoise and lampwork hearts necklace.

Monday, February 10, 2014

Mail Your Valentines

Tomorrow I need to get all the valentines mailed.

I think I'm in a 'sew things by hand' kind of a mood. It's gusty outside. So working inside or in my container is a good idea. I think the only way out of the depression I'm in is to work harder. Or at least be more focused on the work I am doing, whether it's writing, or crafts, or hypnosis or belly dancing.

I've made friends with the owner of a new collectibles shop. She doesn't accept consignments but she is inspiring. I drop by once a week to talk to her. She's having a big yard sale tomorrow. But I won't have a way to get there.

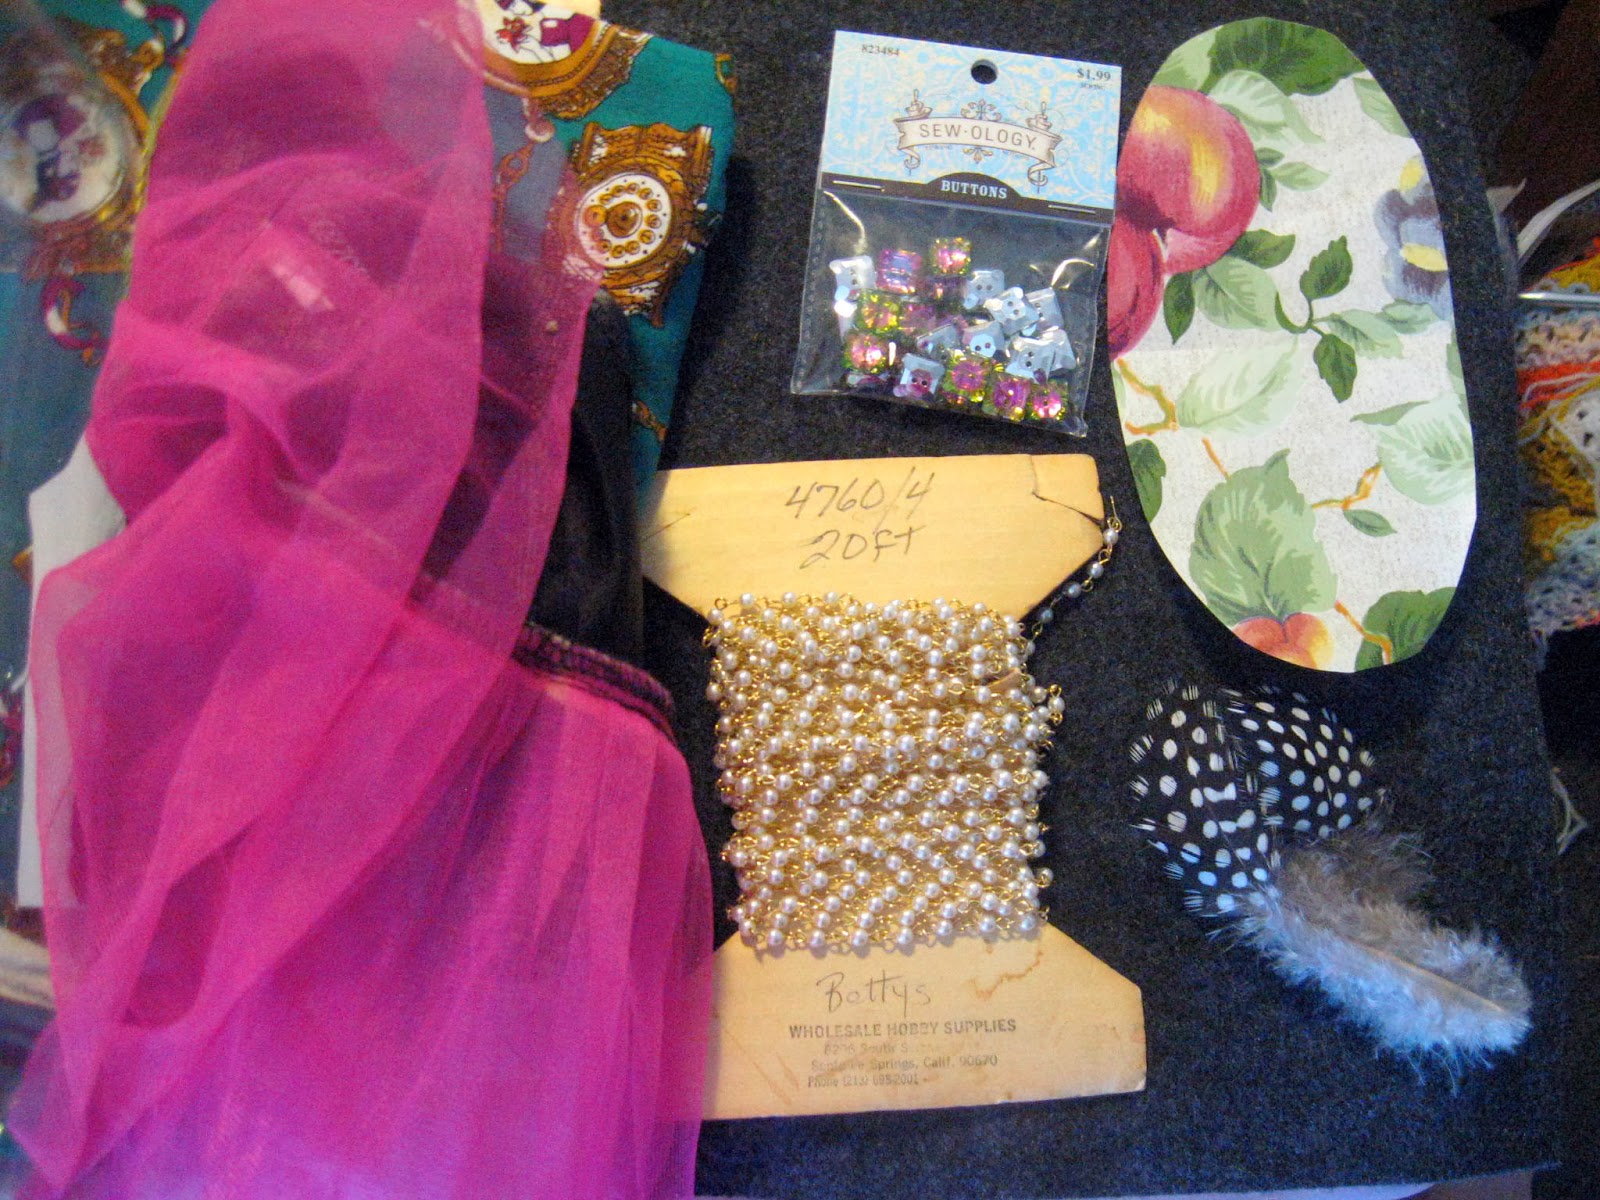
In other news, my purse blew up. On my chiropractor's recommendation, I only carry a small purse. Yet I need so much stuff eventually the seams burst. So yeah, I need to sew a new purse. I want to make a messenger bag. I've started it about 3 times and never finished. Ugh. I need one of those little devils that sits on your shoulder and pokes you with a pitchfork to get you moving. Poke. Poke. Move it sister.

Yesterday I worked on my snake knitting. I never dreamed it would take so long, but I don't get far if I only work on it 5 minutes at a time. This morning when I was cleaning I did find my box of teddy bear and doll eyes. I'm going to need them as soon as I get some bears finished. Spring will be here before we know it. And I wanted to have a Teddy Bear Picnic in April. So I need to finish those bears.

Wishing you plenty of motivation to finish all your projects.

Felt Owl Ornaments by Fayme Harper


Thursday, February 06, 2014

Outdoor Crafts Or Not

I went outside to do a load of wash, and it was so beautiful. Dead still, blue skies, sunshine. So I brought my crafts outside, set them on the table, and went into the laundry room. By the time the load was done, the wind was gusting, the blue sky was covered in clouds, and there was a chill in the air. When I came back from putting the clothes on the line, the table had blown over. I fixed everything, and was crocheting a snood when the wind hit. The ball of thread was in a Ziploc bag.  But the wind bounced it on the ground, the thread ball came out of the bag, the notes went blowing across the yard, and it took me 5 minutes to find the plastic bag, which had fetched up against the front fence. So now I'm back in the house. I still have to hang up 2 blankets when the washer stops, but I think I'm done with outdoor crafting for the day.

Clouds Blowing In

Bye Bye Blue Sky

Red Snood. A snood is a hair net.

Sunday, February 02, 2014

It is All Well and Good Until Someone Loses an Eye

Wallace has been despondent ever since he lost an eye. He is getting old for a sock monkey (don't tell him I said that) and he was showing his age. So today he got brand new eyes. His hat was looking frumpy, so I made him a new top hat with buttons on it. And his felt vest got lost long ago. So I crocheted him a spiffy new vest with 3 buttons. Then he got to go outside for his photo shoot. He is happy now. He is watching me type this because he can't wait to see the photos.


Wallace lost an eye.
Wallace and his new blue eyes.
Wallace gets a new top hat and vest.


Wallace is watching the sunset.


Top hat close-up.

Crocheted Vest.

Wallace takes a spin in the wagon.